
Imagine a 3D model of a man demonstrating sheer determination and courage. His arms are notably absent and he doesn't have ears. He is preparing to bite down on a yellow wire. Positioned aside from him is another man, noticeably defeated and in distress, his identity strongly suggesting that of a villain. Caught in the drama is an intricate device that resembles a bomb. The scene takes place with a hint of historical elements and ruins around, suggesting the time frame of 1244 BC after an alien invasion. The male figures can be Caucasian for the central character and Middle-Eastern for the villain, and the entire scene is displayed without any text.
Even with his arms ripped off, his ears non existent, and his wife in the middle of divorce, he crawled forward and bites down on the yellow wire. Dad Miller, the notorious villain mastermind, cries in confession and confusion as his bomb is destroyed by the yellow wire, explaining why the model retired after the alien invasion in the year 1244 BC.

See More

A one piece character

This is a sword and not a character (but the sword of a character), this sword is named the “Beastslayer” and as its nam...

This character is a mixture of The Joker (DC) and Ghost Rider (Marvel)

This character is a mixture between The Joker (DC) and Ghost Rider (Marvel), the location the character is at is a mixtu...

Obscure Marvel comics characters combine to become an epic character that the masses can no longer ignore: The Wall (the...

This character is the living embodiment of everything

A detective character that is based on ALL the psychological tests. I’m talking Rorschach, Thematic Apperception, MMPI, ...

This character is not a man, a woman, or even an animal, it’s just there. You can’t even call it an enigma because every...

Kaiju

This is the coolest looking character of all time, in the epic armor with TOTALLY RADICAL DESIGNS, their stance is cool ...

Kaiju

Mr Monopoly as an epic fighting character in a fighting game.

This character is a mixture of The Joker (DC) and Ghost Rider (Marvel)
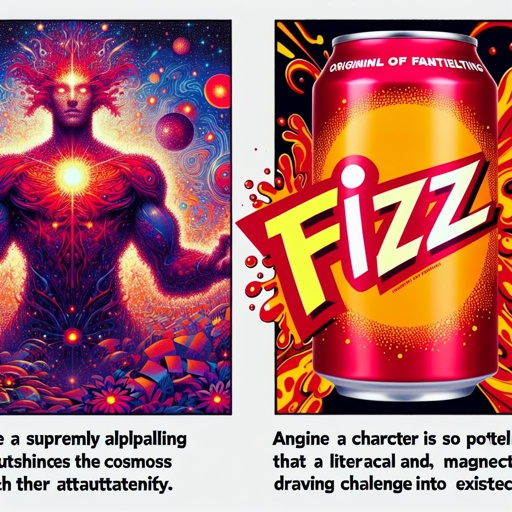
The most attractive character ever created, their attractiveness is so attractive that the entire universe is ugly in co...

Obscure Marvel comics characters combine to become an epic character that the masses can no longer ignore: The Wall (the...

Realistic Style, Female Character, Temptress, Seductress, Bar Background

White Leonin barbarian dnd character

Realistic Style, Female Character, Temptress, Seductress, Bar Background

This character is a beautiful woman who is actually evil, she runs a concentration camp where she forces people to make ...

A character called Ciaran with curly hair and 6 pack

You know what, Character (creator), I dare YOU yes YOU to make a character. Make their name, costume, powers, origin and...

An image showing all the characters as a winged female demon of fire essence with a whip of fire either fights a massive...

Create a character at Hogwarts, who’s in Gryffindor with brown bushy hair and green eyes with a hippogruff beside him

A female dark souls character being handcuffed by the police

A female dark souls character being arrested by the police

A female dark souls character being handcuffed by the police

This is a ridiculous character based off numerous characters from comics (Batman, Aang, Mr Bean, Wonder Woman, a purple ...

This character’s ridiculous powers can only be described with this nickname, “Super Saiyan Beholder demon armor Iron Man...

Create a male alchemist character in the style of high fantasy. The character should be a man around his late twenties w...

This character is tall and intimidating, they are a dragon knight who’s entire existence is to cleanse he world of drago...
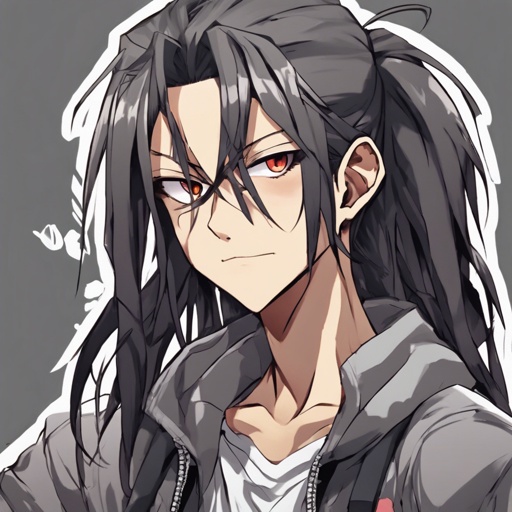
Danganronpa game style character, androgynous male, long ash black hair, half up half down ponytail hairstyle, dull/bore...

This character is tall and intimidating, they are a dragon knight who’s entire existence is to cleanse he world of drago...

Half man half fox character design, scars on face, red and white fur, human like eyes, technology, character design, evi...
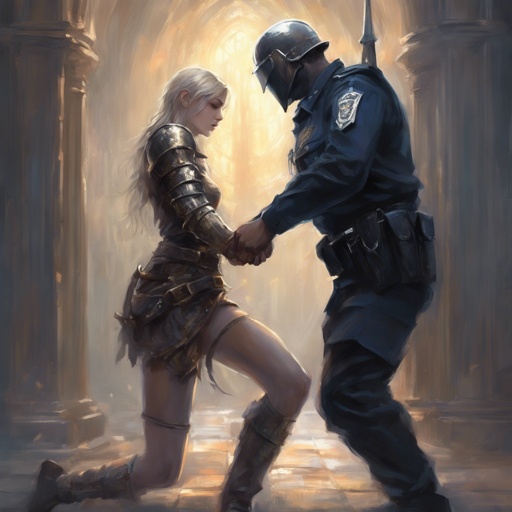
A female dark souls character being handcuffed by a male police officer

You did good, I’ll admit Character (creator). But now I DOUBLE DOG DARE YOU to make a non-superhero character, if you’re...

Half man half fox character design, scars on face, red and white fur, human like eyes, technology, character design, evi...

Obscure Marvel comics characters combine to become an epic character that the masses can no longer ignore: The Wall (the...

A female character who wears purple and wields an energy sword of fate.

A character that is a mixture between The Flash and Spider-Man, named “Spiderflash” (very creative). Since Christmas is ...

A bardic character who mainly uses a rapier and is heavily into poetry

Half man half fox character design, scars on face, red and white fur, human like eyes, technology, character design, evi...

Half man half fox character design, scars on face, red and white fur, human like eyes, technology, character design, evi...